One of the useful features of Photomatix Pro is that you can tonemap a single file (RAW, JPEG or TIFF). There is, however, a trick which allows you to process a single RAW file the same way as bracketed sequence and in my opinion this technique produces slightly better results. How can you do this? Read on.
 In this short tutorial I will use Adobe Camera RAW but any RAW converter (including Lightroom, Canon Digital Photo Professional etc.) will work as well.
The idea is to create multiple exposures out of a single RAW file by varying exposure value in the RAW converter. Of course this means that apart from the exposure the rest of the parameters (like for example White Balance) have to be exactly the same for all the files as otherwise the results might be quite weird.
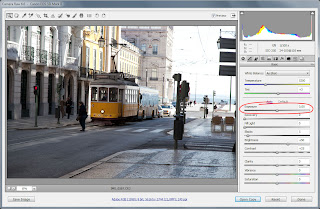
- First open your RAW file in Adobe Camera RAW.
- Set all your settings as desired (including White Balance). All settings apart from Exposure have to be the same for all images.
- Change Exposure value to -2.0.
- Click Save Image button and output it under the name eg. fake_HDR_1.tif
- Change Exposure value to 0.0.
- Click Save Image button and output it under the name eg. fake_HDR_2.tif
- Change Exposure value to 2.0.
- Click Save Image button and output it under the name eg. fake_HDR_3.tif
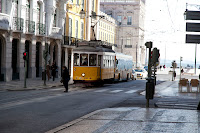
Note the difference in the sky. In the darkest image it's blue whereas in the rest of the images it's completely blown out.
Now drag your images into Photomatix. Following dialog box will appear.
What we really changed in Adobe Camera RAW was image pixels but the data in EXIF remained the same, meaning that all images will have the same exposure information (i.e. shutter speed, ISO and aperture). Photomatix tries to guess EV based on the images but in case it's wrong you can change the values in the last column manually. In case of this example I changed +3,00 in the first row to +2,00 as this was what we typed in Adobe Camera RAW for the brightest image.
The rest of the process is exactly the same so I skip it here as you can read about it eg. in my HDR tutorial.
The image at the beginning of this post has been created this way. I used 5 files created from 1 RAW photo and used exposures of: -3.0, -1.5, 0.0, 1.5, 3.0. Thanks to -3.0 I restored some detail and colour in the sky. 0 EV photo had almost completely white sky what didn't look very good nor appealing.
Please note that the effects won't be as good as when using real bracketed photos, eg. I would have much better colours and details in the sky but to be honest I initially didn't intend to make HDR of this photo but then I changed my mind.


I've been doing this technique for ages and I've had some brilliant results, no more carrying tripods around for me...!
ReplyDeleteThe only problem is that the results won't be the same as for 7 exposures :) they will be even worse than "regular" 3 exposures HDR
DeleteDziękuję ,to dla mnie ważna podpowiedź.
ReplyDeleteYou can do it same thing in lightroom by creating a virtual copy, just change xp
ReplyDeleteGoran, I know :) however, I didn't want to introduce concept of Virtual Copy in this tutorial (I described it here: http://hdrphotographer.blogspot.com/2013/03/tip-lightrooms-virtual-copy.html)
ReplyDeleteSorry, didn't see that
ReplyDelete